Once the data has been imported into Squirro, you can embed it in the QlikView dashboard using the Squirro QlikView Extension, which you have already installed.
Previously, you loaded the bug report data into Squirro. The goal of this part of the tutorial is to show the bug reports that correspond to the current user selections.
3.1. Add the Extension
Next, add the Squirro extension to the dashboard:
- Start QlikView.
- From the QlikView menu, choose File -> Open…, find and select the
BugReports.qvwfile, and click Open. - Enable the WebView from the QlikView menu by choosing View -> Turn on/off WebView.
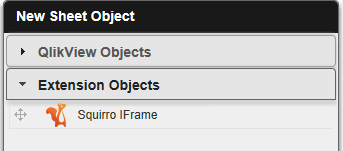
- Right-click on an empty space in the dashboard and, from the context menu, choose New Sheet Object.
- In the New Sheet Object dialog (pictured above), click
Extension Objects. You should now see the
Squirro IFrameextension. - Drag the
Squirro IFrameextension to the dashboard and position it below the existing chart. Once the extension has been added to the dashboard, move and resize it as needed by touching it at the border. - Close the New sheet Object dialog.
3.2. Configure the Extension
Next, configure some basic extension settings.
- Right-click on the border of the extension (as soon as you see the split up-down arrow) to open the properties dialog, and then click Properties….
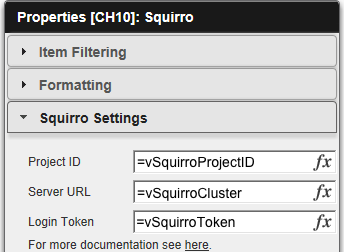
- In the Properties dialog (see the screen shot on the right), click the Squirro Settings tab.
- Change the following settings to use the variables (defined in
LoadScripts\00_main.txt) from importing:- Project ID: Change to
=vSquirroProjectID. - Server URL: Change to
=vSquirroCluster. - Login Token: Change to
=vSquirroToken. By configuring this token, the user will automatically sign into Squirro without needing to know the email address and password of the Squirro user.
- Project ID: Change to
You should now see all bug reports displayed in the dashboard.
3.3. Configure Item Filtering
Next, the extension needs to be configured so that any user selection gets
forwarded from QlikView to the extension object. This tutorial uses
expressions to build a Squirro-compatible filter query (defined in
LoadScripts\04_filters.txt).
Priority Filter
All the selected priority values are OR-combined into a filter expression:
// priority filter
SET vPriorityFilter = if (GetSelectedCount(priority) > 0, '(' & concat(distinct 'priority:"' & priority & '"', ' OR ') & ')');
Status Filter
All the selected status values are OR-combined into a filter expression:
// status filter
SET vStatusFilter = if (GetSelectedCount(GeneralStatus) > 0, '(' & concat(distinct 'GeneralStatus:"' & GeneralStatus & '"', ' OR ') & ')');
Severity Filter
All the selected severity values are OR-combined into a filter expression:
// severity filter
SET vSeverityFilter = if (GetSelectedCount(GeneralSeverity) > 0, '(' & concat(distinct 'GeneralSeverity:"' & GeneralSeverity & '"', ' OR ') & ')');
Query Filter All the individual filter expressions above are tied together as a query filter:
// query filter
SET vQuery =
    if (Len($(vPriorityFilter)) > 0, $(vPriorityFilter)) &
    if (Len($(vPriorityFilter)) > 0 AND (Len($(vSeverityFilter)) > 0 OR Len($(vStatusFilter)) > 0), ' AND ') &
    if (Len($(vSeverityFilter)) > 0, $(vSeverityFilter)) &
    if (Len($(vSeverityFilter)) > 0 AND Len($(vStatusFilter)) > 0, ' AND ') &
    if (Len($(vStatusFilter)) > 0, $(vStatusFilter));
Year Filter
Moreover, the following filter expressions are used only to select bug reports that correspond to the selected year:
// year created_after filter
SET vCreatedAfter = if(GetSelectedCount(ts_year) > 0, Min(ts_year) & '-01-01');

// year created_before filter
SET vCreatedBefore = if(GetSelectedCount(ts_year) > 0, Max(ts_year) & '-12-31');
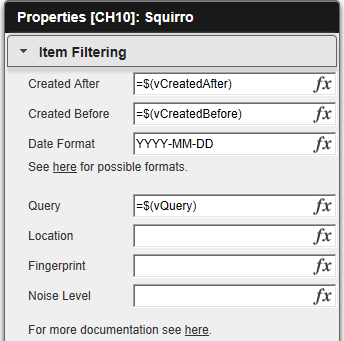
In the Squirro extension properties dialog, open the Item Filtering tab, and change the following settings:
- Created After: Set to
=$(vCreatedAfter) - Created Before: Set to
=$(vCreatedBefore) - Date Format: Set to
YYYY-MM-DD - Query: Set to
=$(vQuery).
3.4. Configure Formatting
In the Squirro extension properties dialog, open the Formatting tab, and change the following setting:
- Date Format: Set to
YYYY
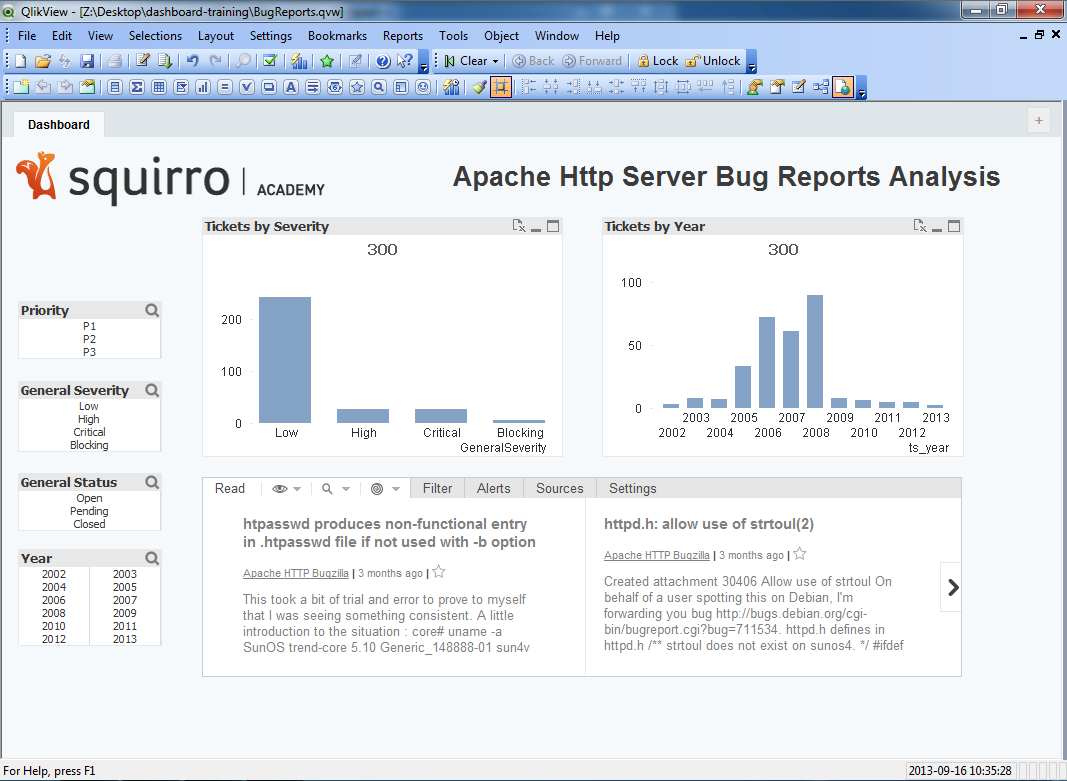
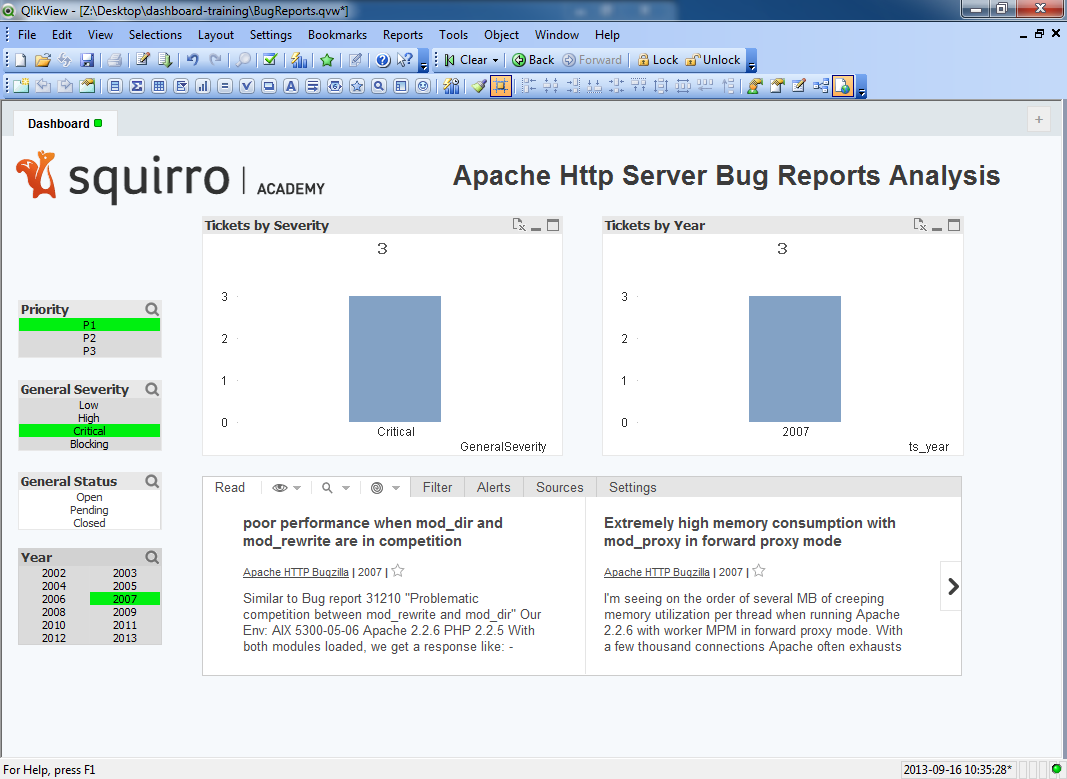
3.5. Final Dashboard
Once the extension has been configured to forward any user selection from QlikView to the extension object, the dashboard is ready for use. As soon as a selection is changed, notice that the extension displays only the corresponding bug reports.
Next: 4. Using Smart Filters