The IT Help Desk project is an example QlikView dashboard that is used to analyze help desk tickets.
2.1. Open the Sample Dashboard in QlikView
To prepare to load data, begin by opening the project file BugReports.qvw in QlikView and the load scripts LoadScripts\00_main.txt, LoadScripts\01_map.txt, etc. in a text editor of your choice (e.g. Notepad++).
2.1.1. Start the Dashboard
Start QlikView.
2.1.2. Open the BugReports Project
From the QlikView menu, choose File -> Open…, find the BugReports.qvw file that was extracted into the example project folder on your system, and then click Open.
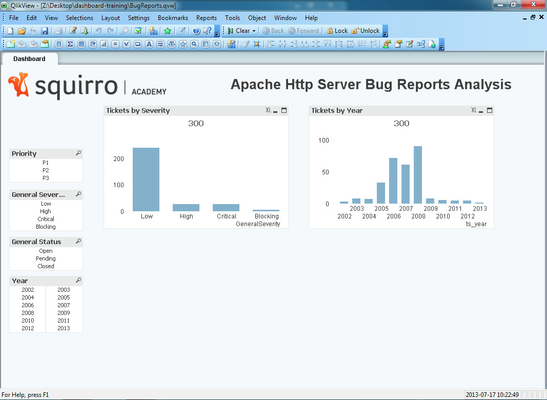
QlikView displays a simple dashboard that shows tickets with groupings by severity and year, as shown in the following example.
2.1.3. Become Familiar with the Dashboard
Navigate the dashboard to become familiar with its interface.
2.1.4. Open the Load Script
From the QlikView menu, choose File -> Edit Script… and open the load script. Notice that code instructions for tabs are included from files on your local file system. The following tabs are defined:
- Main (included from
LoadScripts\00_main.txt): Contains all variable declarations. - Map (included from
LoadScripts\01_map.txt): Defines status mappings. - Data (included from
LoadScripts\02_data.txt): Manipulates the source data. - Squirro (included from
LoadScripts\03_squirro.txt): Manipulates the data extracted from Squirro. - Filters (included from
LoadScripts\04_filters.txt): Contains all necessary filter expression declarations.
2.1.5. Open the Data File
Open the DataSources\tickets\bugzilla.csv file in a text editor. The file contains the data to load. Note that each bug report also contains textual fields, such as summary and body, and a link to the original source document. Your task is to display these bug reports in the right context on the dashboard so that the user can see the details behind the current selections.
2.2. Create a Squirro Account
Before you can import the data, you need to set up the Squirro account into which the data will be imported.
2.2.1. Start Squirro in a Box
Start Squirro in a Box, if you have not already done so.
2.2.2. Open Squirro
In a browser, open Squirro (see Connecting to Squirro if you are unsure about how to get there).
2.2.3. Create a Squirro Account
Create a Squirro account by completing the following steps:
- Click the Sign up button.
- On the sign-up form, enter an email address (such as
ithelpdesk@example.com) for the account. - Specify a password for the account.
- Click the Sign up button.
Squirro creates the account, logs you in, and redirects you to the Add Project screen.
2.3. Generate User Token
Next, you need to prepare for API access by obtaining a user token, which you generate while logged into Squirro. The /wiki/spaces/WIP/pages/2949365 needs this user token to authenticate in Squirro before it can load data.
To generate a user token, complete the following steps.
- Make sure that you are signed into Squirro using the account you just created.
- On the top-right of the page, click the displayed email address.
- From the menu, click the Settings option.
- Click API Access.
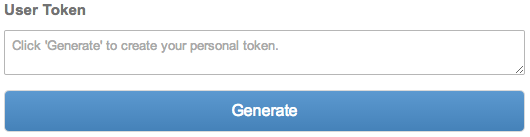
- In the User Token section, click the Generate button to generate a new token used for API access.
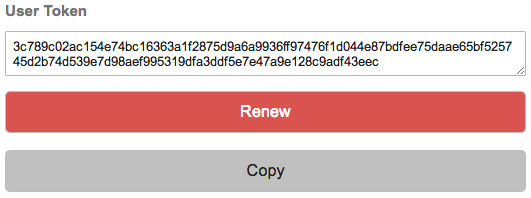
The token is saved as depicted below. You can always come back to this settings screen to access the token again.
2.4. Modify the QlikView Load Script
Next, you need to modify the load script associated with the IT Help Desk dashboard. The load script creates a new .csv file based on the source data (which contains only the information to be imported).
For this tutorial, the following fields from the in-memory data store will be imported:
idilinktitletsstatusGeneralStatusclassificationresolutionpriorityseverityGeneralSeveritysummarybody
2.4.1. Open the Load Script
In a text editor, open the LoadScripts\02_data.txt file, which contains the LOAD statement used to load the bug reports from the .csv file. The LOAD command populates the QlikView in-memory data store from which to create a new .csv on disk. The intermediate .csv file is used to forward data to Squirro.
2.4.2. Create CSV File Using STORE Command
Create the .csv file by running the QlikView STORE command, as shown in the following example:
| Code Block | ||
|---|---|---|
| ||
// store transformed bug reports data on disk
STORE
    id,
    i,
    link,
    title,
    ts,
    status,
    GeneralStatus,
    classification,
    resolution,
    priority,
    severity,
    GeneralSeverity,
    summary,
    body
FROM Bugzilla into $(vOutTickets) (txt); |
2.4.3. Drop Unnecessary Data
To free up resources in the in-memory data store, drop the following fields:
tssummarybody
To drop these fields, run the following command:
| Code Block | ||
|---|---|---|
| ||
// drop unstructured bug report fields to free up memory
DROP FIELDS ts, summary, body; |
2.4.4. Reload the Load Script
- Save the file.
- From the QlikView menu, choose File -> Reload. QlikView will create a new file (
squirro.csv) in theDataSources\outputdirectory.
2.5. Import Data into Squirro
Next, use the Squirro bulk loader to import the generated CSV file into Squirro.
2.5.1. Open the Load Script
In a text editor, open the LoadScripts\00_main.txt file.
2.5.2. Code Used for Setup in the Load Script
The following lines in the load script do all the necessary setup. (For easier editing, this code has been split into multiple variables.):
| Code Block | ||
|---|---|---|
| ||
// general Squirro settings
LET vSquirroProjectID = '2pI...g5g';
LET vSquirroCluster = 'http://localhost:8300';
LET vSquirroToken = 'e10...62e';

// bulk loader command-line options
// * use a log file on disk
// * default item mapping
// * date / time parsing of ISO 8601 format
// * keyword declarations for facets
LET vLogSettings = '-v --log-file $(vDataSource)';
LET vMapSettings = '--map-id id --map-link link --map-created-at ts --map-title title --map-summary summary --map-body body';
LET vTimestampParsing = '--created-at-format YYYY-MM-DDTHH:mm:ss';
LET vKeywordSettings = '--map-keyword GeneralStatus classification resolution priority severity GeneralSeverity';


// source settings
LET vSourceSettings = '--project-id $(vSquirroProjectID) --source-id apache-http-2 --source-name "Apache HTTP Bugzilla"';

// bulk loader command-line executables
LET vCluster = if (vSquirroCluster = 'https://squirro.com', '', '--cluster $(vSquirroCluster)');
LET vSquirroBulkLoader = 'squirro_bulk_loader $(vCluster) -t $(vSquirroToken) $(vLogSettings)bulk.log $(vMapSettings) $(vTimestampParsing) $(vKeywordSettings) $(vSourceSettings) --infile $(vOutTickets) --reset csv'; |
2.5.3. Specify the Project ID
Replace the value of the vSquirroProjectID variable with the project id. The project identifier can be retrieved from the project settings (see also Connecting to Squirro).

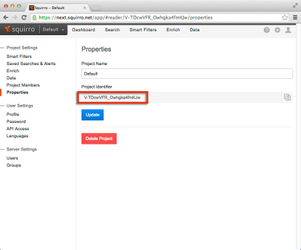
The project identifier can be copied to the clipboard. In this example it is V-TDcwVFR_Owhgka4fmKJw.
2.5.4. Specify the Squirro Token
Replace the value of the vSquirroToken variable with the user API token you generated earlier.
2.5.5. Uncomment Bulk Loader Code
The following lines are used to execute the Squirro bulk loader as part of the document reload process:
| Code Block | ||
|---|---|---|
| ||
// call the command-line tool to bulk load the pre-processed data
EXECUTE cmd.exe /C $(vSquirroBulkLoader);
EXECUTE cmd.exe /C timeout 30; |
Uncomment the corresponding sections in the load script LoadScripts\02_data.txt and save the file.
2.5.6. Load the Data
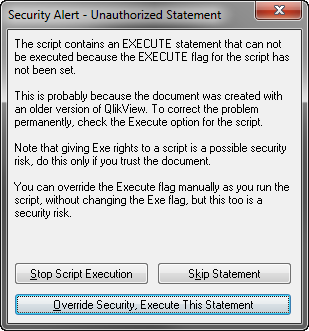
- Reload the data by choosing File -> Reload from the QlikView menu. QlikView will display a security alert warning about the
EXECUTEstatement. - Go ahead and click the Override Security, Execute This Statement button to continue executing the script, which begins the import process.
- While loading data, the bulk loader writes a log in the directory where the QlikView document is located. Open the
bulk.logfile in this location and scroll to the bottom. If you see any errors, consult /wiki/spaces/WIP/pages/2949372.
2.6. Verify Data
- Connect to Squirro again in the browser.
- If necessary, sign in using the email address and password you chose earlier.The library now shows a project with the name
Apache Http Server Bug Reports. - Navigate the interface to become familiar with the example project.
Next: 3. Integrate into the DashboardThis page can now be found at Qlik Sense on the Squirro Docs site.