The integration of custom steps in the lib/nlp of Squirro has been split here into four major steps:
Exploration and implementation
Use the jupyter notebook setup as described here to do your EDA, develop your classifier and train your machine learning models if there is dedicated HW.
Create a lib/nlp step which includes the classifier or is able to run the pre-trained model:
To start you would need to get access to the lib/nlp on github, clone it and install it.
In addition we consult the page of the lib/nlp documentation (https://squirro.github.io/nlp/api/steps/classifiers/ ). To make it easier we can inherit from the classifier base class, which comes with some pre-defined parameters like
input_field,input_fields,label_fieldandoutput_field. Below you see a template which you can use to fill in your code for your classifier:"""Custom classifier class""" from squirro.lib.nlp.steps.classifiers.base import Classifier class CustomClassifier(Classifier): """Custom #Classifier. # Parameters type (str): `my_custom_classifier` my_parameter (str): my parameter """ def __init__(self, config): super(CustomClassifier, self).__init__(config) def process(self, docs): """ process/execute inference job on the incoming data """ return docs def train(self, docs): """ train your model """ return self.process(docs)To make it work we need also have a look at the incoming data structure. In both functions
trainandprocessthere is a list of Documents handed over. Which fields are populated is depending in the prior steps and their configuration.Note: The
train-function can be a pseudo function specially if a pre-trained model is used. Meaning that thetrain-function does not need to actually train a model if a trained model is provided and the step only is meant for inference execution.
Local testing
you can run your custom step with the following workflow locally to test if it works. Of course you can also load data via CSV, JSON etc.:
workflow = {
    "dataset": {
        "items": [{
          "id": "0",
          "keywords": {
            "label": ["fake"]
          },
          "body": "<html><body><p>This is a fake Squirro Item. It is composed of a couple fake sentences.</p></body></html>"
        },{
          "id": "1",
          "keywords": {
            "label": ["not fake"]
          },
          "body": "<html><body><p>This is not a fake Squirro Item. It is composed of a couple not fake sentences.</p></body></html>"
        }]
    },
    "pipeline": [
        {
            "fields": [
                "body",
                "keywords.label"
            ],
            "step": "loader",
            "type": "squirro_item"
        },
        {
            "input_fields": ["body"],
            "output_field": "prediction",
            "label_field": "keywords.label",
            "step": "custom",
            "type": "custom_classifier",
            "name": "custom_classifier",
            "my_parameter": "my_value"
        }
    ]
}
Note: The field
namerefers to the file name of the custom classifierthe workflow can get run if lib/nlp is installed with:
training mode
from squirro.lib.nlp.runner import Runner
runner = Runner(workflow)
try:
    for _ in runner.train():
        continue

finally:
    runner.clean()
inference mode
from squirro.lib.nlp.runner import Runner
runner = Runner(workflow)
result = []
try:
    for item in runner.infer():
        result.append(item)
        continue

finally:
    runner.clean()
Note: execute the script above in the same folder as the you have stored the custom classifier
Upload
Our custom classifier step and optionally the trained model needs to be stored in the same folder before we can upload our custom classifier:
custom_ml_workflow
|
+ - custom_classifier.py
  - (optional: physical_model)
Now the folder can be upload using the SquirroClient:
from squirro_client import SquirroClient

client = SquirroClient(None, None, cluster=CLUSTER_URL)
client.authenticate(refresh_token=TOKEN)
client.new_machinelearning_workflow(
    project_id=PROJECT_ID,
    name="My Custom Workflow",
    config=workflow,
    ml_models="custom_ml_workflow"
)
The
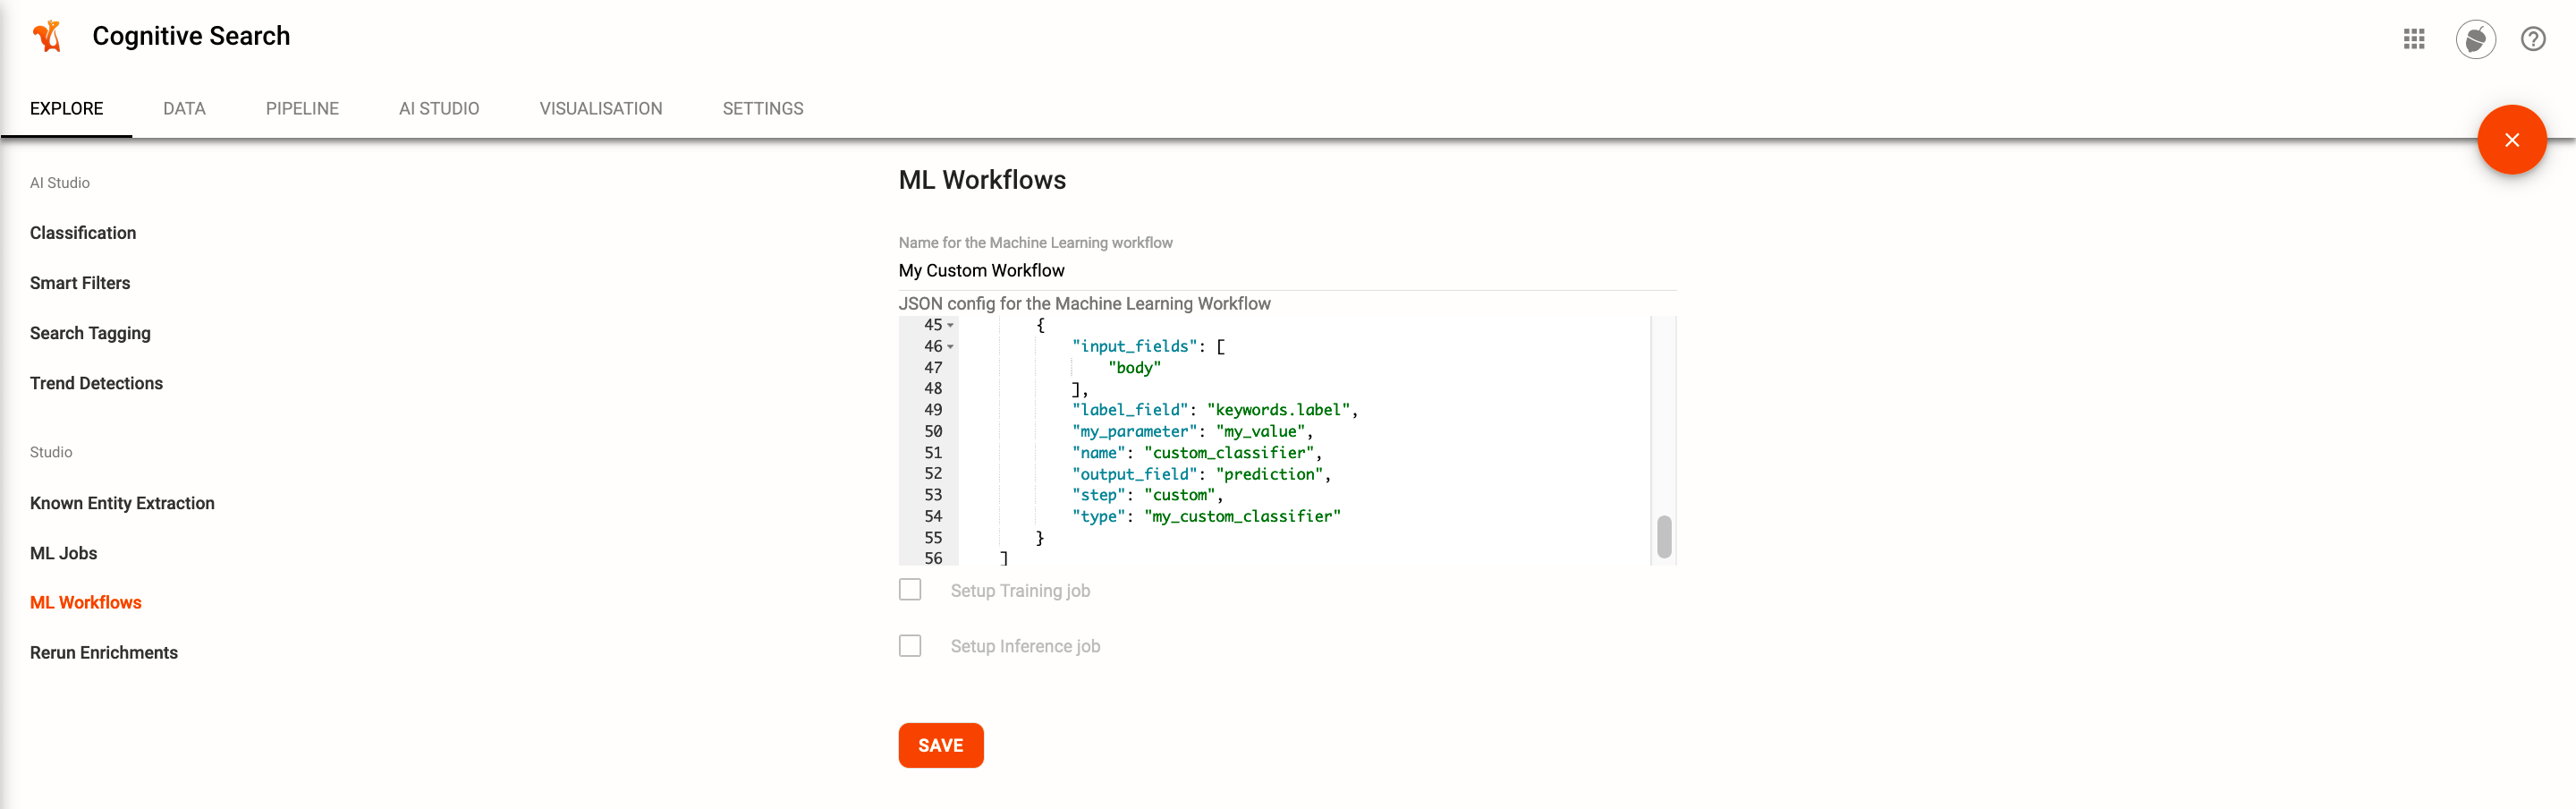
workflowis a dict containing the ml workflow as shown in the local testing section. The ml workflow can be adjusted later.ml_modelsis the path to the folder where the classifier and the model has been stored.When checking the ML Workflow studio plugin in the AI Studio tab you can see the uploaded ML Workflow. Which can be edited:
Usage
Now the custom classifier can be used in three different scenarios:
Use the ML Job studio plugin to run training and inference jobs. To run the jobs on data which are indexed in Squirro we suggest to use the SquirroQueryLoader. Further to store the classifications and predictions we suggest for sentence-level jobs to use the SquirroEntityFilter step and for document level jobs to use the SquirroItemSaver step.
If the a trained model is uploaded with the custom classifier step, we can also make it available in the enrich pipeline to directly classify documents which get loaded. Currently there is not straight way to create a Publish Model directly from a custom ML Workflow via the SquirroClient. So we would need to access the
machinelearningDB and update theworkflow_idwithidof the custom ml workflow in a existing row in thepublishtable. Check the workflow section of the ML Template to see which steps are required in the ML workflow.The last option is to make a custom step available within a ML Template in the AI Studio. Currently there is no other option then transform the custom step to a actual step of the lib/nlp and then creating a new ML template by following the documentation (https://nektoon.atlassian.net/wiki/spaces/SQ/pages/1870955131).