Table of Contents
Introduction
We test Squirro with the latest version of VMware vSphere ESX/ESXi 5.5. But as we release Squirro as a OVA template you should be able to deploy it on older revisions as well.
For a good experience we recommend to provision at least:
- 4 GB of RAM
- 500 GB storage
- Note: You can easily resize the disk later
- Note: The disks are thin provisioned, the initial disk usage is approx. only 5 GB
- 2 CPU Cores (4 or more are recommended)
Step 1 - Download
Download the most recent version from the /wiki/spaces/BOX/pages/2949127 space (requires a license).
Step 2 - Deploy the OVA file
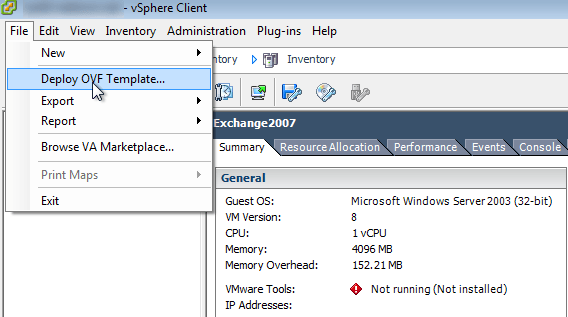
With the vSphere Client connect to your ESX or vCenter server.
Select File > Deploy OVF Template.
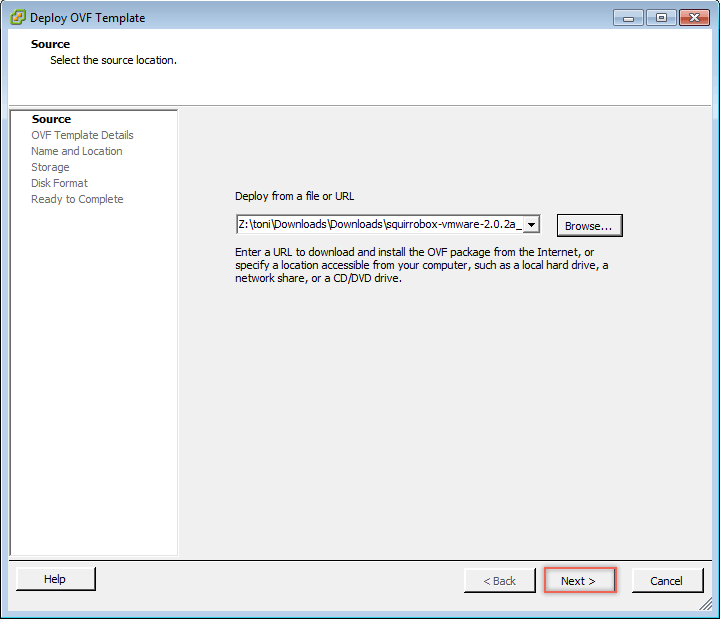
Click the Browse button.
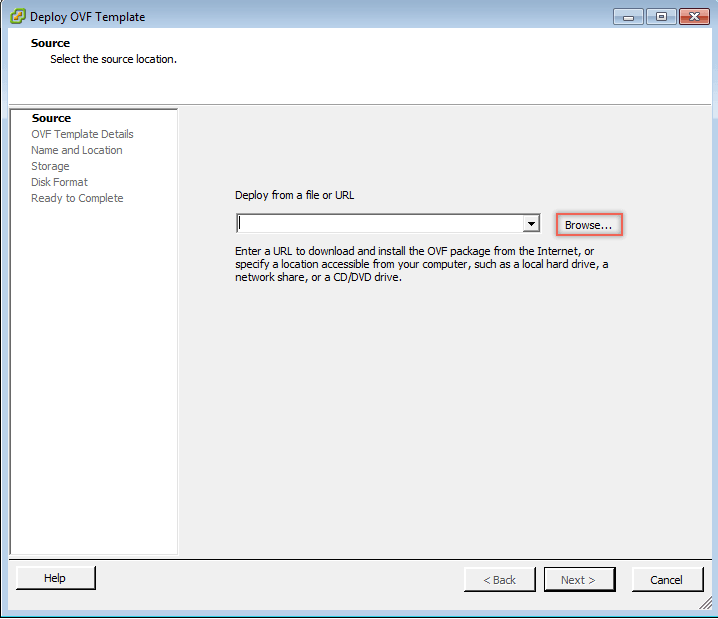
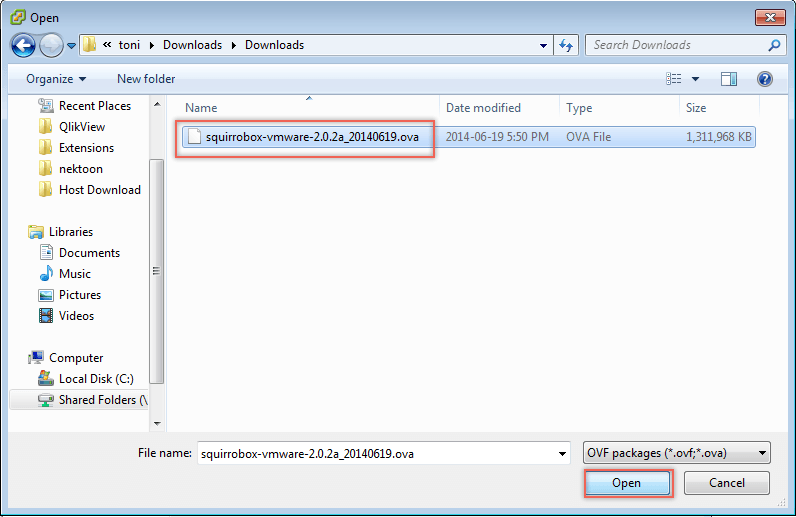
Select the OVA file that you've downloaded.
Click the Next button.
Click the Next button.

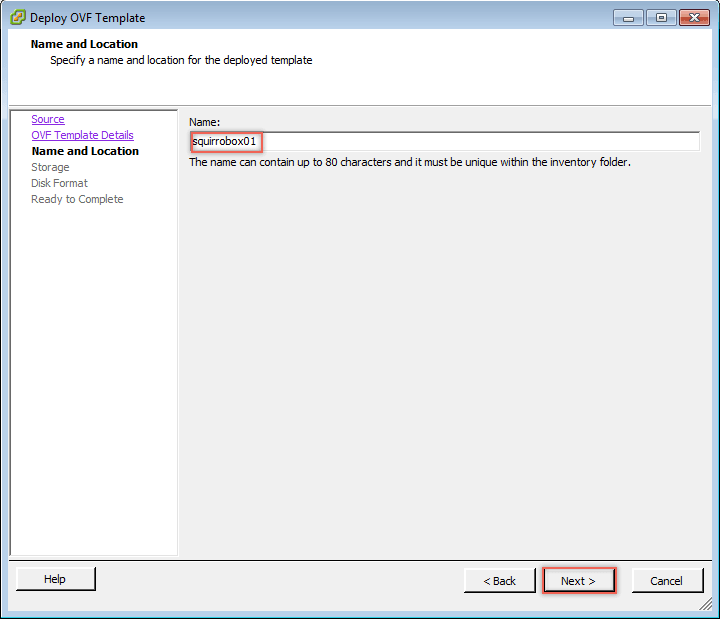
Enter the Name of your virtual machine machine you're about to create. Then click the Next button.
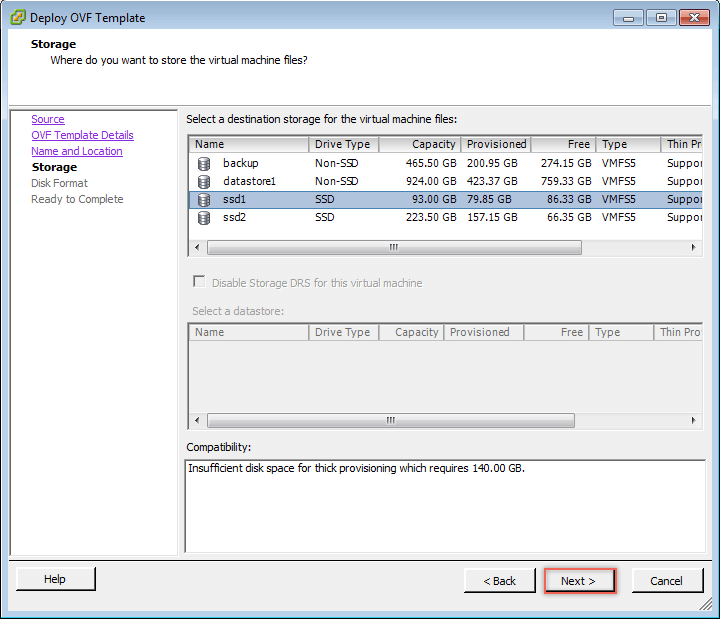
Select a destination store. The target storage should have at least 140GB of free space (however only approx. 5 GB is claimed initially)
Squirro benefits from fast IO, SSD based storage is recommended.
Once you've selected the storage click Next.
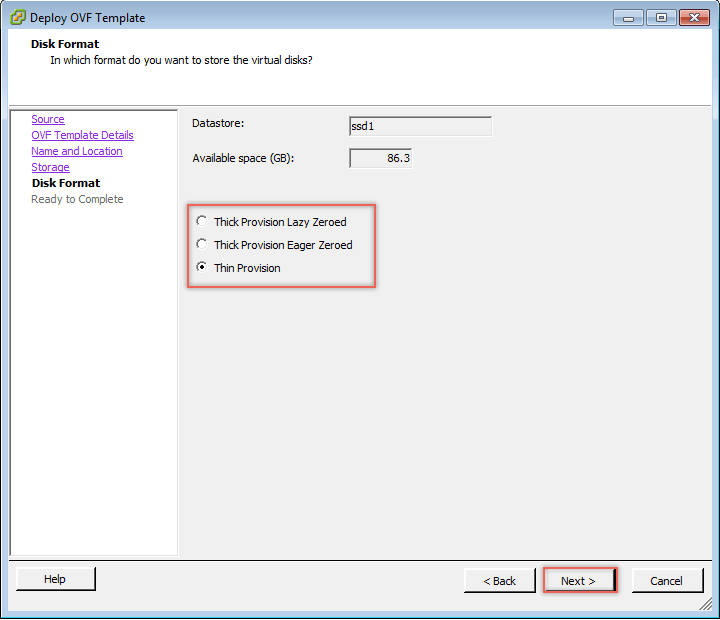
Select the disk format.
- To reduce the storage used initially, select Thin Provision.
- For improved performance select one of the Thick Provision modes.
Click the Next button.
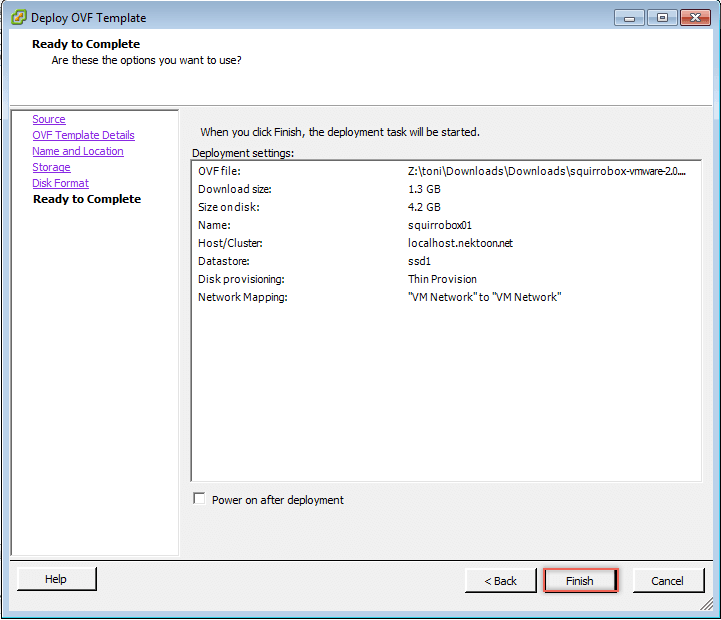
Review your choices to far, then click the Finish button.
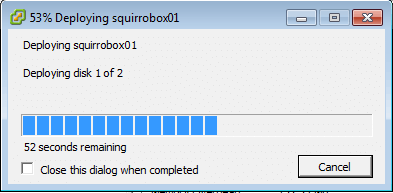
Wait for the upload to complete. Then click the Close button.

Step 3 - Configure the Virtual Machine
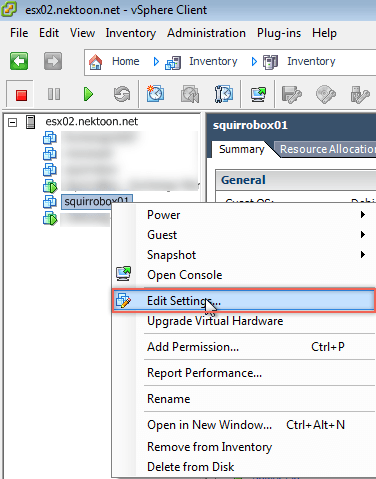
Locate the new virtual machine, right click the virtual machine and select Edit Settings....
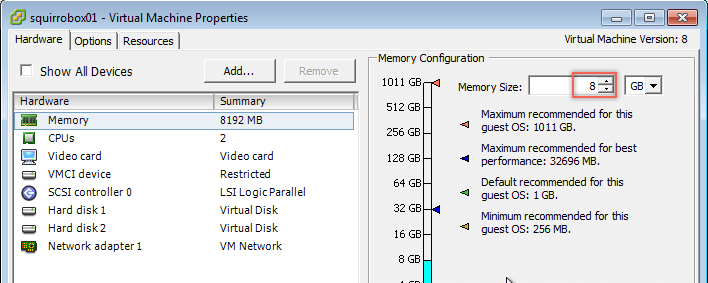
Review the allocated Memory. A minimum of 4 GB, provide 8 GB or more for best results.
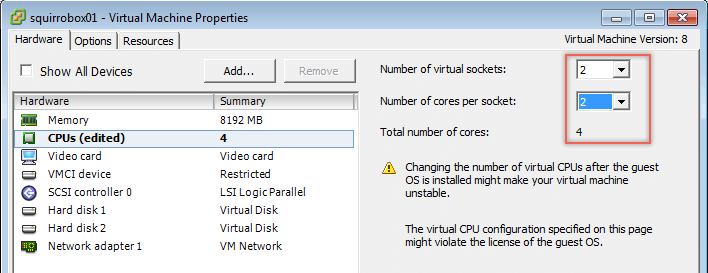
Review the allocated CPU resources. The minimum total number of cores is 2. We recommend 4 or more CPU cores for best results.
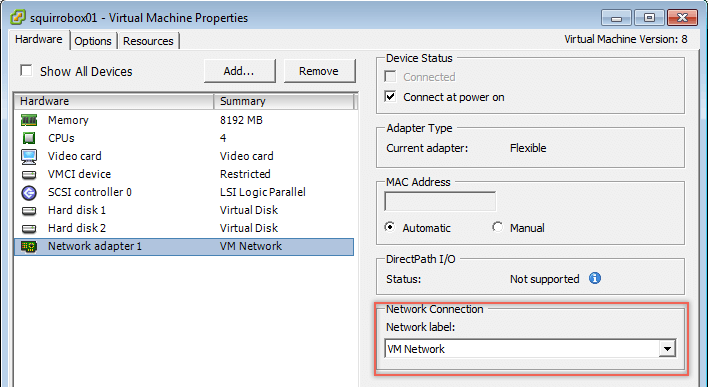
Review the network configuration and ensure the virtual machine is connected to the correct network.
Step 4 - Launch Squirro in a Box.
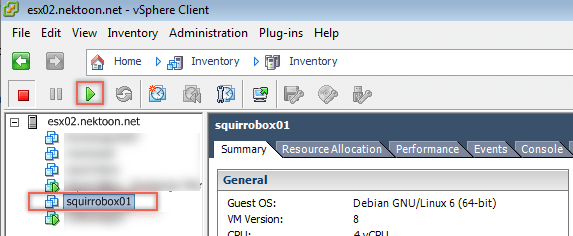
Select the virtual machine, then click the green Play button.
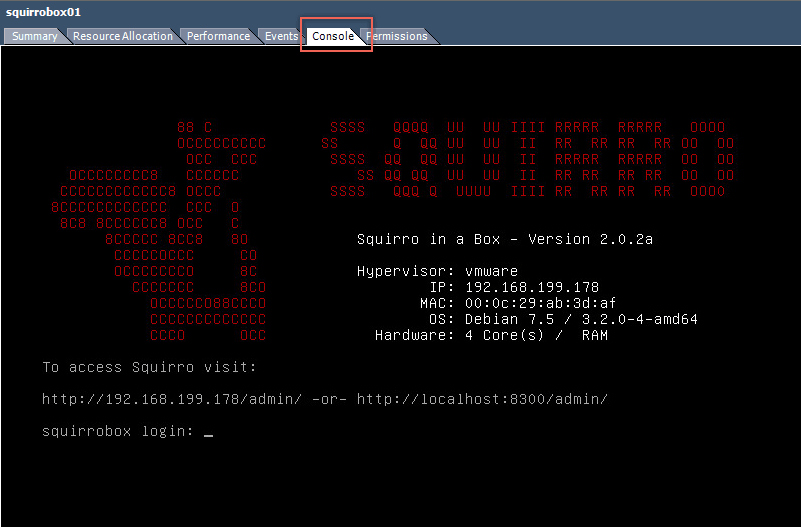
Open the virtual machines Console. The boot process should finish in approx. 60 seconds.
Note the IP address shown in the console login screen. This is where you can now access the Squirro Application with your Browser.
Step 5 - IP / DNS Configuration
This step is optional.
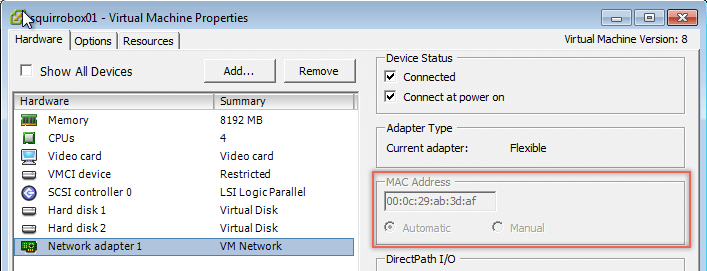
Open the Virtual Machine Properties and select Network adapter 1.
Locate the MAC Address section an note down the MAC Address.
On your DHCP Server assign a static IP to this MAC address. If required, reboot the virutal machine to make the IP change effective.
Assign a hostname to the assigned IP on your DNS server, for easier access.
Step 6 - Access Squirro
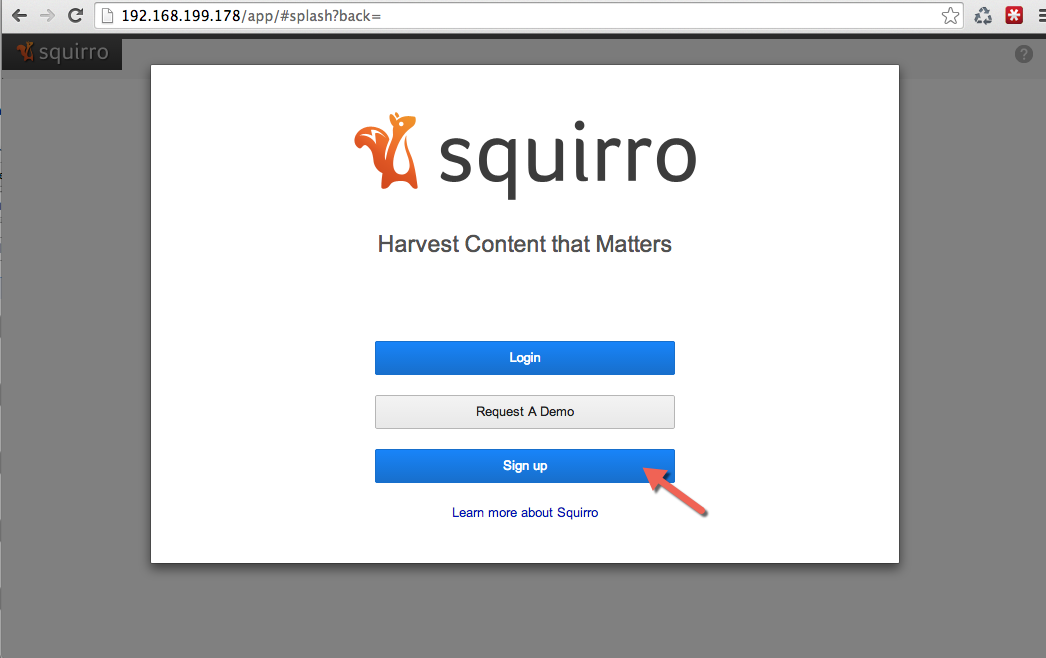
Congratulations! You have successfully installed Squirro on your ESX server. You can use Squirro by pointing your browser at http://<ip address displayed in the console> or http://<hostname assigend in your DNS>.
Squirro ships without any user account. To create the first admin account click the Sign up button.