...
- Open the Dashboard page by clicking on
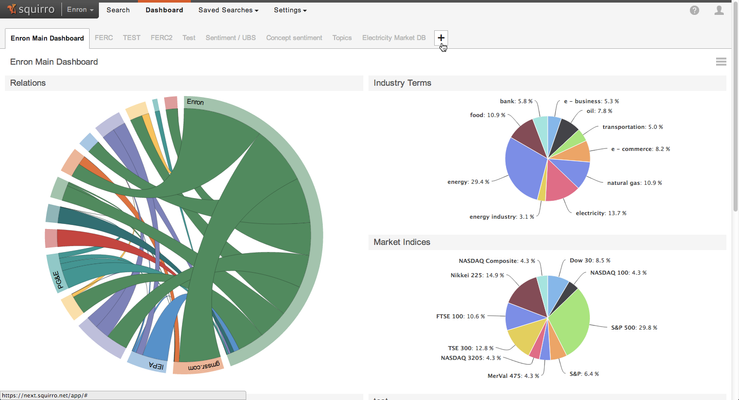
Dashboardin the top menu. - Click on the + sign at the end of the list of existing dashboards.
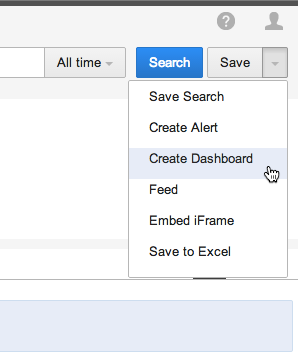
- Alternatively, you can use the save button's dropdown to create a dashboard from the current search query.
- Name your dashboard and provide an initial query (you can change both the name and the query later on). To include all documents, leave the query empty.
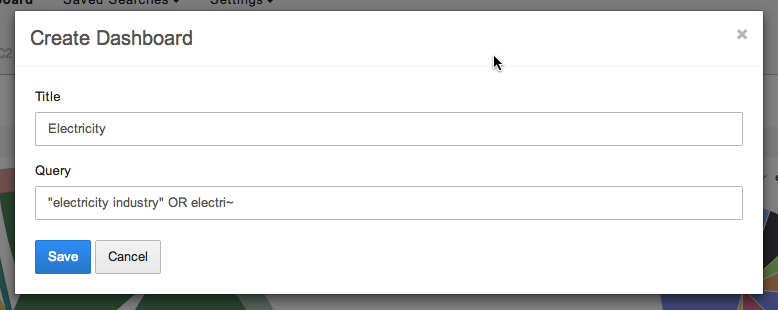
- Press
.Status colour Blue title Save Directly after creation, you are presented with a fresh dashboard, an empty widget and a configuration panel for it.
- Continue with the next sections to learn how to configure the newly created dashboard.
Editing dashboards
To enter editing mode,
- Click on the dashboard settings pencil icon at in the top right upper corner of the dashboard,:
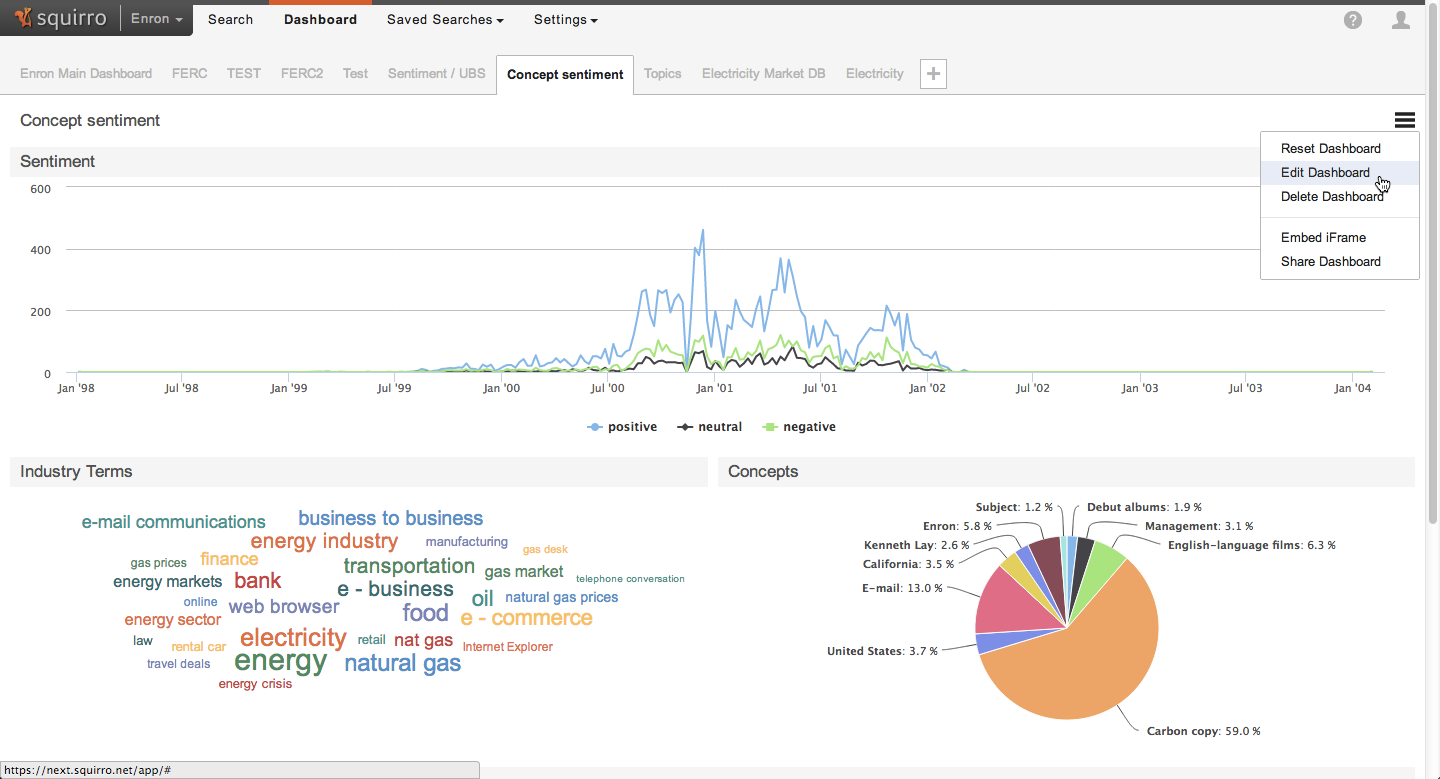
- Click on
Edit Dashboard. 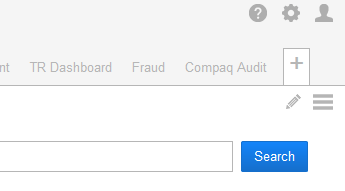
You are now in editing mode.
...
- Enter editing mode using the steps described above,
- Enter the new title in the title field (1) and the new query in the search field (2).
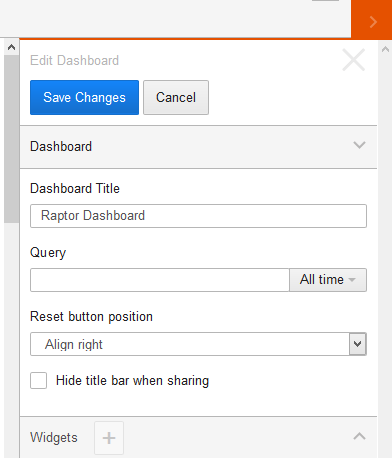 In the edit sidebar to the right, open the Dashboard section
Enter the title and query as desired.
Once done, press
Status colour Blue title Save Save Changesbutton at the top to save your changes or
or press Cancel to abandon them (3).Status title Cancel
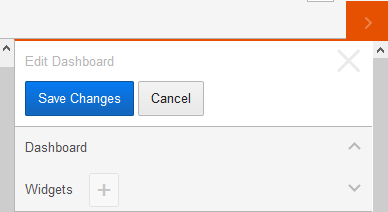
Widgets
Widgets are the building blocks of a dashboard. Each widget represents data in a particular form. Currently, Squirro offers a number of built-in widgets, such as pie charts, time frequency graphs (line charts) and word clouds.
...
- Enter edit mode on the dashboard,
- Click the dashboard settings button in the right upper corner of the dashboard,
- Select
Add widgetfrom the dropdown. - In the edit pane on the right, press the plus button next to the "Widgets" header.
- Set a title and the widget type to use in this form.
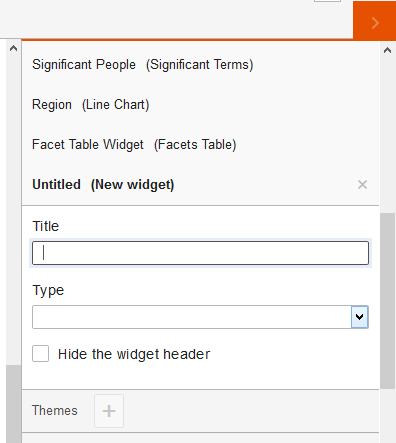
See the Widgets documentation for information about the various widget types. - Depending on the widget type, additional configuration options may be displayed and required.
- Changes made in this form are applied immediately to the dashboard, but not yet saved.
- To save the changes, use the
Save Dashboardbutton at the top of the edit sidebar.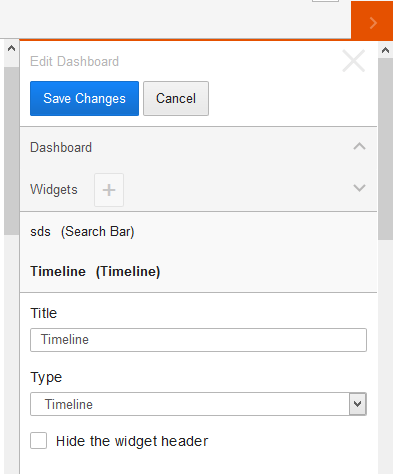
Moving widgets
To move a widget,
...
- Enter editing mode as described above,
- Click on the widget settings pencil icon in the right upper corner of the widget's frame,Select
Editfrom the dropdown menu.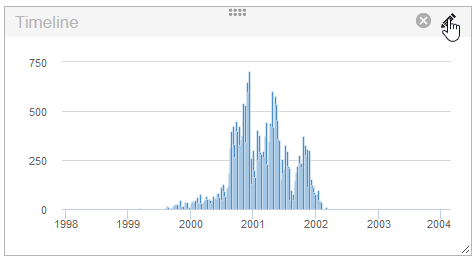
Once you have made your changes, clickSaveto retain them orCancelto revert to the widget's original settings.
- The widget is activated in the edit panel on the right side of the screen.
- Changes made in this form are applied immediately to the dashboard, but not yet saved.
- To save the changes, use the
Save Dashboardbutton at the top of the edit sidebar.
Deleting widgets
...
- Enter editing mode as described above,
- Click on the widget settings delete icon in the right upper corner of the widget's frame,Select
Removefrom the dropdown menu.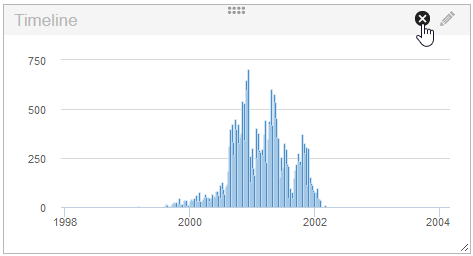
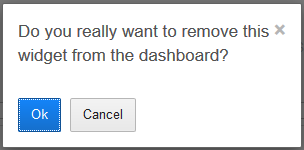
- Confirm the deletion in the resulting dialog.
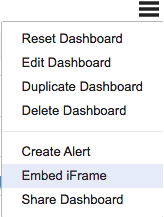
Embedding and Sharing Dashboards
...
- Click the Dashboard Setting Button and select "Share Dashboard" or "Embed iFrame"
Both are technically the same, but the
The Embed iFrame offers an iframe HTML tag, instead of just a URLwhich can be used for embedding the dashboard in a 3rd-party web site or application. The Share Dashboard option offers a URL, which can be easily shared via email or other means.
Dashboard URL API Reference
This API allows for easy integration into any web enabled 3rd party application.
Once you've collected the URL for your dashboard, the The URL which is generated by the Embed and Share options in the dashboard can be extended with additional options. The following URL parameters can be used to change the behavior of the dashboard.
| Parameter | Description | Example Value |
|---|---|---|
| query | Override the Dashboards search query | &query=(blue OR green OR red) |
| selection | Set the Foreground query for all Significant Terms widgets | &selection=blue |
| created_before | Only display results with a created_at value lower than this | &created_after=2012-12-31 |
| created_after | Only display results wit ha with a created_at value higher than this | &created_before=2014-12-31 &created_before=2014-12-31T18:30:00 |
| relative_start | Only display results with a created_at value higher than this, in relative terms to today | &relative_start=2y |
| relative_end | Only display results with a created_at value lower than this, in relative terms to today | &relative_end=1y &relative_end=4w |